Edit Text in Image Online: Replace Words in Seconds
If you’ve ever tried to edit text in image for a poster, a product label, or a screenshot, you already know the pain: the background isn’t flat, the font doesn’t match, and any tiny mismatch makes the result look fake. The good news is you can edit text in image online now—without rebuilding the entire design in a heavyweight editor.
This guide shows a practical workflow to edit text in image cleanly, especially when the text sits on complex textures (paper, fabric, gradients, shadows). You’ll also learn prompt patterns that help AI keep the original look while updating only the words you need.
When you should edit text in image (and when you shouldn’t)
Editing text is a great choice when you want the image to stay visually the same, but the message changes:
Update pricing, dates, or event locations on flyers
Translate UI screenshots or app onboarding slides
Fix typos in marketing creatives
Replace a brand line on a mockup for A/B testing
However, if the image is already a layered design file (PSD/AI/Figma) and you still have the source, it’s usually better to change the original layers. Use edit text in image workflows when the source file is missing, the design is “baked in”, or you need fast iterations.
The 3-part formula to edit text in image cleanly
To reliably edit text in image, think in three parts: remove, replace, and match.
1) Remove the old text without destroying the background
The hardest part of edit text in image is not typing the new words—it’s preserving the pixels behind the old text. On textured surfaces, you need the removed area to look like it was never touched.
What works well:
Ask for “seamless background reconstruction”
Mention the surface (“paper texture”, “plastic label”, “fabric”, “matte wall”)
Specify “keep lighting and shadows consistent”
2) Replace with the exact words you want
When you edit text in image, be explicit about the new text. Put it in quotes, and keep punctuation exactly as needed.
Replace the text in the image with "Summer Sale 30% OFF".
3) Match typography and layout
Most “bad” edit text in image results fail on typography. If you don’t specify typography, the model may choose a default font that looks close but not correct. Mention what you can observe:
Font style: bold / regular / condensed / handwritten / serif / sans-serif
Placement: centered / left-aligned / baseline aligned to original
Effects: drop shadow / stroke / emboss / glow
Color: pure white / off-white / #111111 / “same as original”
Step-by-step: edit text in image with a prompt (fast workflow)
Here’s a simple workflow you can repeat for most images. It’s designed for speed and consistency, and it works well for marketing graphics, screenshots, and sign photos.
Step 1: Upload the image you want to edit
Pick the cleanest version you have (higher resolution helps). If your image has heavy compression artifacts, edit text in image may produce slightly wobbly edges around fine details.
Step 2: Use a clear prompt that locks what must stay
A strong prompt keeps the model from “improving” your design. For edit text in image, add constraints like “keep everything else unchanged”.
Use this template:
Edit text in image: replace the words "OLD TEXT" with "NEW TEXT". Keep the same font style, size, color, alignment, and spacing. Preserve the background texture, lighting, and shadows. Do not change any other elements.
Step 3: Generate and compare side-by-side
Always compare the result with the original at 100% zoom. The best edit text in image results look boring—because nothing else changed.
Step 4: Iterate with one variable at a time
If the text looks “off”, tweak only one thing per iteration:
Too different font → add “match the original font as closely as possible”
Wrong alignment → specify “centered horizontally” or “left aligned”
Missing shadow → add “keep the same drop shadow”
Color mismatch → specify “use the same color as the original text”
This keeps your edit text in image workflow predictable.
Prompt examples for common edit text in image scenarios
Use these as copy-and-paste starters. Replace the quoted text and the surface description based on your image.
Example 1: Edit a poster headline
Edit text in image: replace "Grand Opening" with "New Menu Launch". Keep font bold sans-serif, same size, centered. Preserve the paper texture and the soft shadow behind the letters. Keep everything else unchanged.
Example 2: Update a price tag on a product photo
Edit text in image: replace "19.99" with "14.99". Keep the same font, color, and label curvature. Preserve reflections on the plastic label and keep lighting consistent. Do not change the product.
Example 3: Fix a typo in a UI screenshot
Edit text in image: replace "Singn in" with "Sign in". Keep the same UI style, font, and spacing. Preserve the button shape, gradients, and all icons. Do not change any other UI text.
Common mistakes that make edit text in image look fake
Most failures come from missing constraints. If you want a realistic edit text in image result, avoid these pitfalls:
Vague prompt like “change this text” without quoting exact words
Forgetting background context (texture, reflections, shadow direction)
Requesting multiple changes at once (text + colors + layout + objects)
Ignoring line breaks and spacing (AI may reflow text differently)
If the image has a very specific font, you can still edit text in image successfully by describing the font style (“condensed uppercase”, “rounded sans-serif”, “handwritten brush”) and explicitly asking for the same letter spacing.
Conclusion: edit text in image faster, keep it natural
To edit text in image well, focus on realism: preserve the background, control typography, and lock everything else. With a good prompt, you can edit text in image in minutes—without recreating the entire design from scratch.
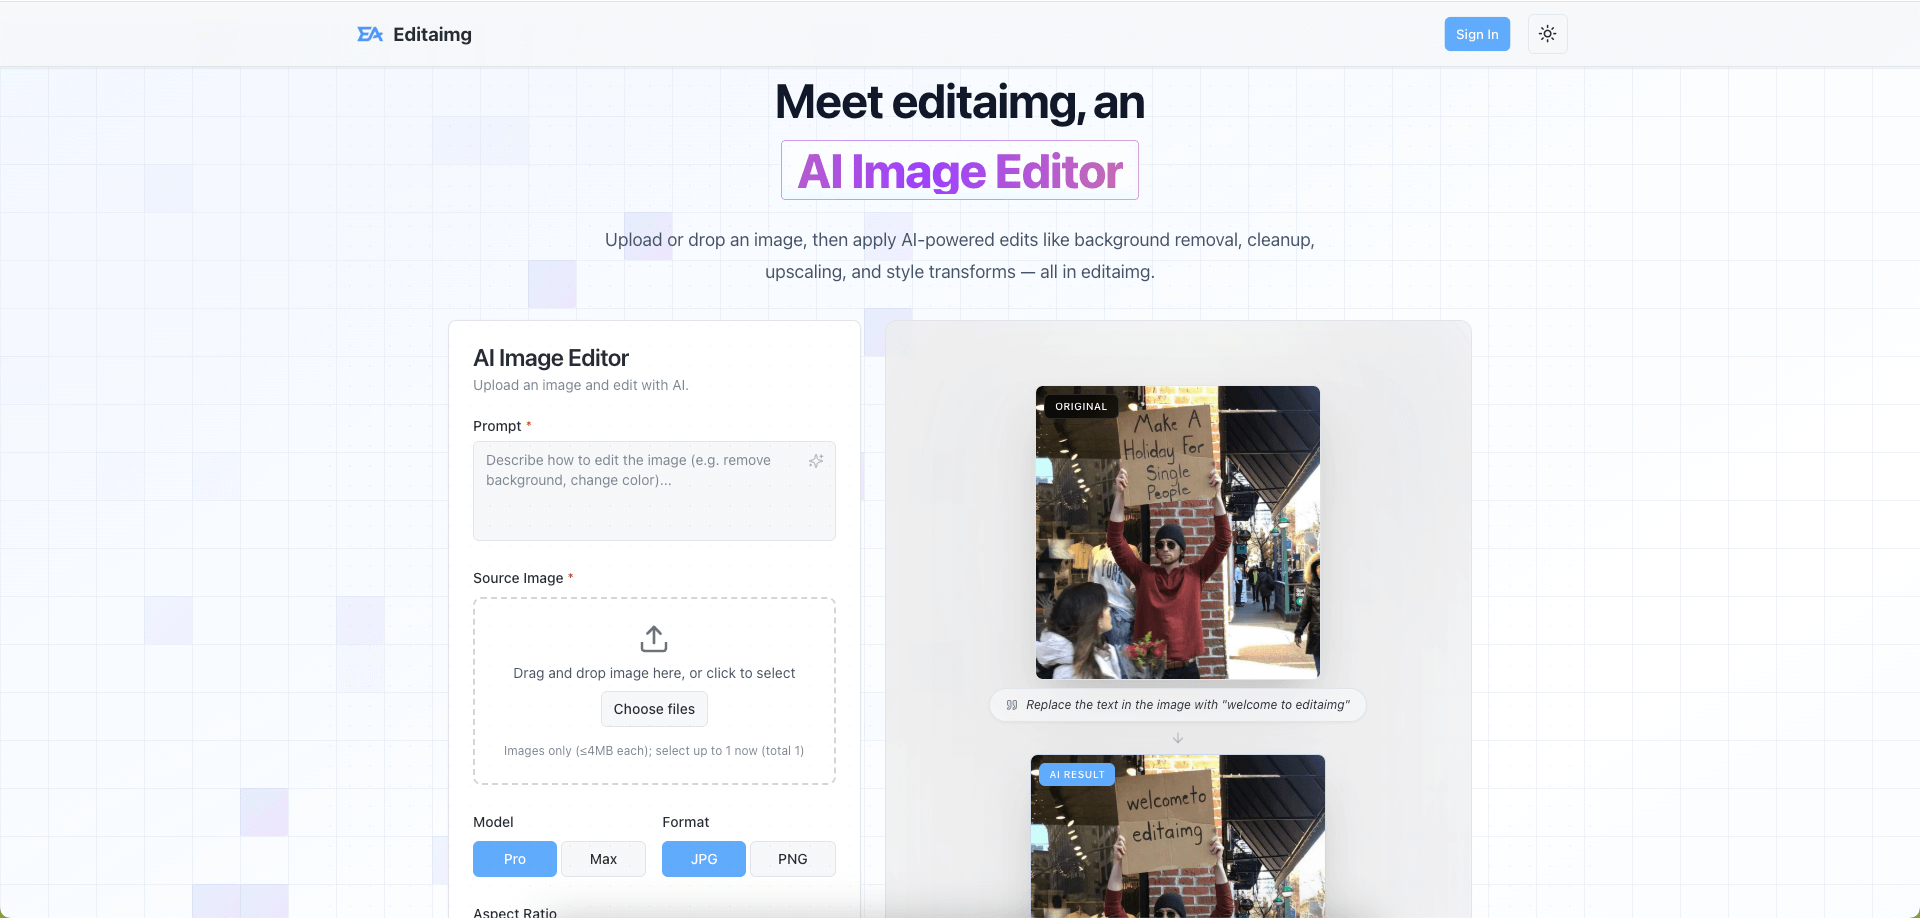
Ready to try it?
Edit Text in Image with EditAImg — upload your image, replace words cleanly, and download a high-quality result.